C4 Corvette's Selective Ride Control - Six Steps for a King's Ride - Page 2 of 3
The Inside Story of C4's Shock Absorber Revolution, Selective Ride Control
© 2009 by Hib Halverson
No use without permission, All Rights Reserved
 |
 |
It Works Like This
Whenever the ignition is turned on (key-up), the SRC controller tests itself, commands the actuators to 0°, then sets them at a starting point determined by system series, controller calibration and switch position. The bypass valves remain at this starting position until the SRC controller receives a vehicle speed sensor (VSS) signal.
| Bypass Starting Points | ||
|---|---|---|
| mode | '89-'91 | '92-'95 |
| Tour | 0° | 0° |
| Sport | 60° | 28° |
| Performance | 110° | 54° |
Once Selective Ride sees VSS data, it begins setting the shocks according to vehicle speed, driver input via the selector switch and the controller calibration. The faster the car goes, the more aggressive the shock valving becomes. The switch skews valve positioning up or down the speed range. For example, with the late system, in the "Tour" mode, at 75 mph; the controller commands Step 2 at 15° valve rotation-pretty soft damping-but in "Sport", at 75, you get Step 4 at 54°-more aggressive damping.
Tour is pretty mild damping in all six steps. In fact, Tour 1, enabled below 50-mph, is the only time the bypass is fully open. The Sport range is good for (well...duh) sporting street drivers. The "Performance" or "Perf" range (originally called "Competition" until some political correctness weenie ordered a name change) is for the most aggressive driving mainly on race tracks. The lowest step in Perf sets the shocks at 54° applying more damping authority than any Tour step and the same as Sport 4. Performance 4 enables at 75-mph and is the only time the bypass closes.
"We spent a lot of time," Scott Allman recalls, "tuning the Tour position to be the most comfortable then, basically, made the Performance position rock hard for the race track or autocross. The Sport position-the middle position-offered improvements in body control (over tour) but unless you were on a road with body input-1-hz or 2-hz-you weren't going to distinguish much. Sport snugged the car down enough, particularly out west, at highway speeds, so you didn't have to go to Performance and its impact harshness."
If you want to feel differences in SRC damping, run 60-70 mph on a concrete highway that is "tilt-slabbed" or has closely-spaced tar strips and causes a cyclical wheel movement GM development engineers call "freeway hop." Move the switch amongst the three settings and you'll feel damping change as the controller moves the bypass valves.
According to Scott Allman, there was a "3rd generation" Selective Ride under development. "SRC 3" would have used "high-powered actuators" to speed bypass valve movement such that response time improved to about 30-milliseconds allowing the system to act in near real-time. Additionally, accelerometers allowed that system to adjust damping according to body motion rather than just vehicle speed. When GM decided to go to a different system being developed by Delphi for 1996, (RPO F45 "Electronic Selective Real Time Damping" or "RTD"), SRC work ceased. For Corvette buyers, that was a great loss as the '96 RTD had less bandwidth, was bi-state (only two levels of damping) and was an inferior system to SRC in-spite of it being near-10-year-old technology.
When Things Goes Wrong
Selective Ride Control has on-board diagnostics. If you key-up and the self-test fails, one or more shocks doesn't initialize, a bypass valve doesn't move quickly enough or, once you're moving, there is no VSS input; a two-digit, diagnostic trouble code (DTC) sets in the controller memory, the "Service Ride Control" light comes on and the shocks are commanded to 60° (MY89-91) or 30° (MY92-95). If the problem is a specific shock, its actuator is turned off. At any time after key-up and self-test, if a bypass valves doesn't move quickly enough, a problem with the controller occurs or the selector switch fails; a code will set. At any time, if system voltage goes below 10.0 or above 16.0 volts, no codes set and the service light says off, but no actuator movement occurs until voltage normalizes.
To display DTCs: turn the key on but do not start the engine, ground diagnostic link connector (DLC) terminal C of the '89-'93, 12-pin connector, or terminal 3 of the '94/'95, 16-pin connector, then observe the flashing Service Ride light.
Each digit is signified by half-second-apart flashes. A second separates the two digits. Each code is flashed three times. Each code sequence is bracketed by code 12, signifying its start and finish. Say DTC13, a left-rear, time-out error, is set. Turn the key on, ground the diagnostic pin and the service light flashes once, then twice (12), three times in succession, each separated by a second. Then, it flashes once, then three times (13) and does that three times. Finally, it flashes once, then twice, three times in succession. Numerically, it's like this: 12-12-12-13-13-13-12-12-12. To clear codes, ground the SRC diagnostic pin for two seconds, three times in succession.

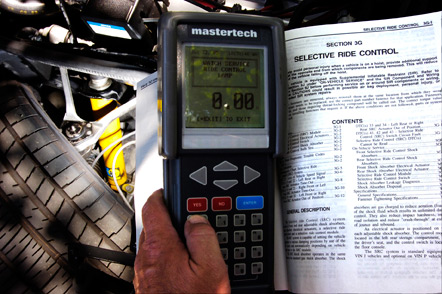
You can either connect a jumper wire from the appropriate DLC pin to ground or you can connect a scan tester, like this Bosch Mastertech. Either way commands the SRC controller to flash DTCs. The book at the right is the Corvette Service Manual, an indispensable reference for SRC DIYs.
Image: Author
To make flash-code and diagnostics work, you've got to jumper across DLC pins. In most C4s, it's tough to see the diagnostic connector well enough to count pins. Corvette Central has the solution: grounding plugs which snap onto the DLC. We've used a set of these plugs for '94-'95 (PN 304800) and they are a great idea. You simply push one on the DLC, then key-up-way easier than fussing with jumper wires. A set of them (PN 604259) is, also, available for '90-'93, 12-pin DLCs.
A Bosch TECH 1, TECH 1A , TECH 2 or Mastertech scan tester equipped with brake and chassis software for the model year in question (along with, in some cases, a DLC adapter) can, also, command the controller to display DTCs and to clear codes.
There are three simple electronics problems SRC may experience. DTC23 (loss of VSS signal) sets if you key-up three or more times without moving the car. If you have a 23 for that reason, as soon as move, the light will go out. If the selector switch is in-between positions, DTC42 will set. Properly adjusting the switch will turn the service light off, if 42 set because of switch position. In either of these situations, you still need to clear codes to erase any history code retained in memory which might confuse future diagnostic sessions.
It's common with recently-purchased, used C4s equipped with SRC to find the system not working and the service light not on. Because the cost of repairs can be high, a common, but idiotic solution is to remove the service light bulb which gives the driver the impression no problem exists. The service light should flash once after key-up as proof the system and its diagnostics are working. If the service light does not momentarily flash, check the bulb.
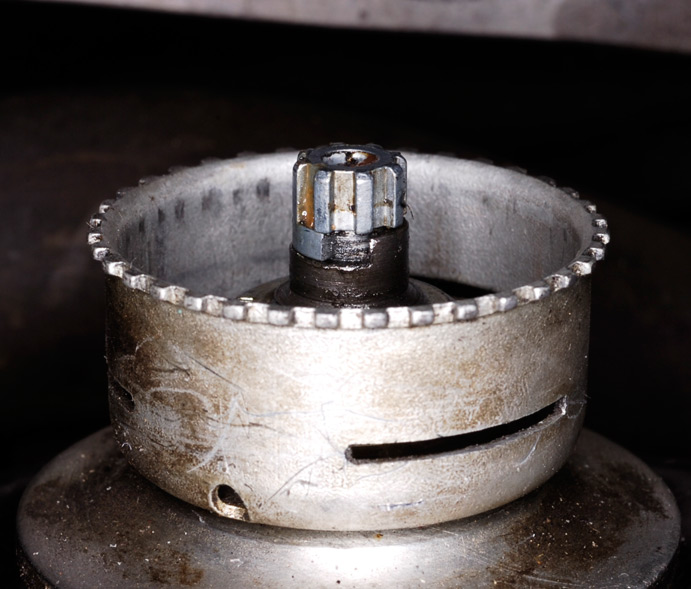
Some damper mechanical problems can be: 1) leakage-the durability of the original, concentric shaft sealing system has been inconsistent. If it fails, gas pressure forces shock oil through the gap between the piston rod and the valve shaft at the top of the shock. In the front, oil appears at the bottom of the actuator and leaks down, over the upper shock insulator and onto the shock mounting bracket. In the rear, it leaks from between the frame rail and the shock mounting plate. Leakage at those places means the shock needs to be either rebuilt or replaced. This type of leakage should not be confused with "dampness" which is acceptable on the piston rod shafts below the upper shock mounts. 2) The front, upper shock insulators can be softened by some oils or solvents and will "squish" out from beneath the retainer. If you find that problem, replace the insulators. 3) If you drive on a surface which causes "freeway hop" or has large tar strips and you move the SRC selector but feel no change in damping, check for either an inoperative service light bulb or for worn or damaged shocks.
An urban legend about Bilstein dampers is that manually compressing them is a good test of their condition. Not. Short of putting them on a shock dyno, the only way compression is a useful test involves not how they feel, but how far the piston rod will compress before the piston rod bottoms in the shock. Bilstein uses a German word "austrait" for this and if the shock's austrait is about a quarter inch, the shock is probably ok but if it's half an inch or more, the shock has probably experienced an internal failure. An even better test is to compare the austrait of two of the same shocks. If they are markedly different, one or both of the shocks are bad.

You can either connect a jumper wire from the appropriate DLC pin to ground or you can connect a scan tester, like this Bosch Mastertech. Either way commands the SRC controller to flash DTCs. The book at the right is the Corvette Service Manual, an indispensable reference for SRC DIYs.
Image: Author
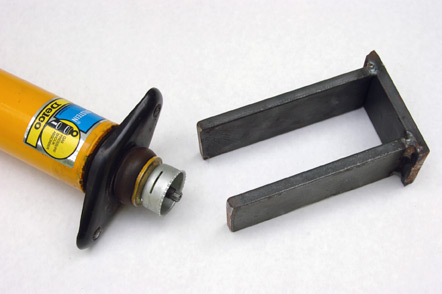
Additional SRC service information is too lengthy to reproduce here. If you're going to do Selective Ride repairs yourself, buy a Corvette factory Service Manual from one of the Corvette parts vendors, such as Corvette Central, and use its diagnostic data to affect repairs. The Manual, also, has specifics on installing the actuators on the shocks and the shocks to the vehicle. Failure to follow proper procedure may result in damage to the actuators and/or the shocks. Aftermarket manuals, such as those from Chilton or Haynes, do not cover SRC, other than having a few sentences saying that the system is too complex and only dealers can service it which, of course, is a distortion of fact.
Bottom line: get the factory book and, in many cases, you can fix SRC yourself.
Service, Parts and Upgrades
Replacement shocks are available from Corvette parts specialists such as Corvette Central, Tom Henry Racing (THR) or Vette Brakes and Products. For several years, actuators were discontinued, but in 2002, Bilstein had 2000 of them made. THR sells them as does Bilstein. At this writing, in December of 2008, all the shock mounts or "insulators" have been discontinued, but polyurethane replacements for SRC shock insulators are available from Tom Henry Racing, Corvette Central and Doug Rippie Motorsports.
Both the stock controllers ('89-'91, PN 22115156 and '92-'95 PN 22151010) are discontinued GM Parts, however, at this writing, there are a few dealers which still stock the early unit. Those needing a '92-'95 controller should inquire at aftermarket Corvette parts specialists, such as THR or Corvette Central, used parts vendors, Corvette salvage yards or they'll have to buy a "Motorsports Controller" and a stock '92-'95 calibration (or "cal") from THR. This controller has a plug-in EPROM rather than the OE controller's soldered-in EPROM.
The early-to-late conversion allows use of the improved, '92-'95 shocks on an early SRC car. You either convert a set of early shocks to the late configuration or you replace them with late units. This conversion, also, requires the Motorsports Controller and a stock '92-'95 cal.
In addition to O.E. cals, Bilstein offers several, all-out racing calibrations for the motorsports controller intended for drag racing, autocrossing and road racing. The use of these will not alter damping beyond what's available from the shocks. These cals only change how the controller reacts to vehicle speed and the selector switch when it sets the bypass. Motorsports cals degrade ride quality as all disable the system's lower damping ranges and some do not vary the bypass at all so, generally, these calibrations are race-only.
Bilstein offers shock rebuilding which can be less expensive than replacement. Options during the rebuilding are early-to-late conversion and revalving. One or all of these services are available for $145 per shock.
Bilstein covers shocks which are rebuilt, converted and/or revalved with only a 90-day warranty, however, aftermarket replacement shocks are warranted for life. As new, aftermarket, SRC Bilsteins are only about 225 bucks, some people who don't want revalving but need new shocks or want the late shocks pay the extra 55 bucks to get a lifetime warranty.
If you are an aggressive street driver, autocrosser or road racer, have Bilstein revalve your shocks. Several valving configurations are available, including one called "Moraca Valving" which is outstanding for dual-purpose, street/track cars. One disclaimer: if someone buys an aftermarket shock from Bilstein and immediately orders it revalved, the warranty shortens to 90 days so, in that situation, you're better to rebuild and revalve an existing set of shocks rather than buying new.
With street/track valving, damping is more aggressive overall with high bypass valving a little more aggressive and low bypass valving significantly more aggressive. Additionally, the rear shocks get an increase in rebound damping authority which reduces the ZR-1's tendency towards drop-throttle oversteer, a problem caused by a combination of: high lateral acceleration, sudden forward weight transfer, the ZR-1's 200 extra lbs. on the front end, soft spring rates and inadequate rebound damping. The approximate 50% increase in rebound more effectively damps weight transfer and makes the car less susceptible to drop-throttle, oversteer.
 |
 |


